Power Automate Desktop is a popular tool enables users to create automation workflows for various tasks, including automating applications that display dynamic content. While Power Automate offers automatic selector creation, certain scenarios may require users to create custom selectors manually. With the recent big update available for Power Automate Desktop, users can now edit and test selectors directly from the GUI (Graphical User Interface).
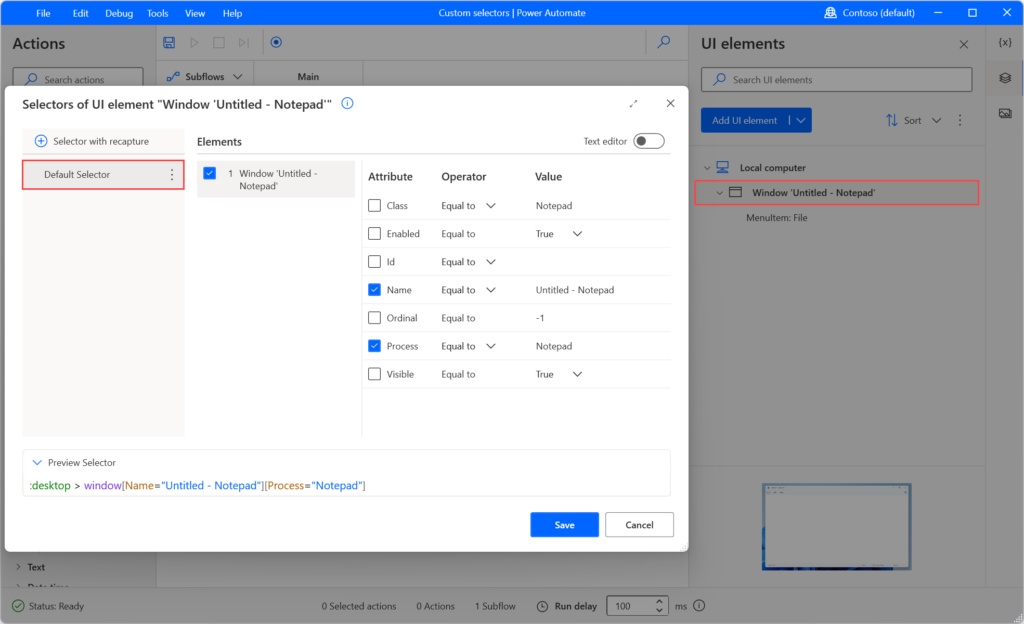
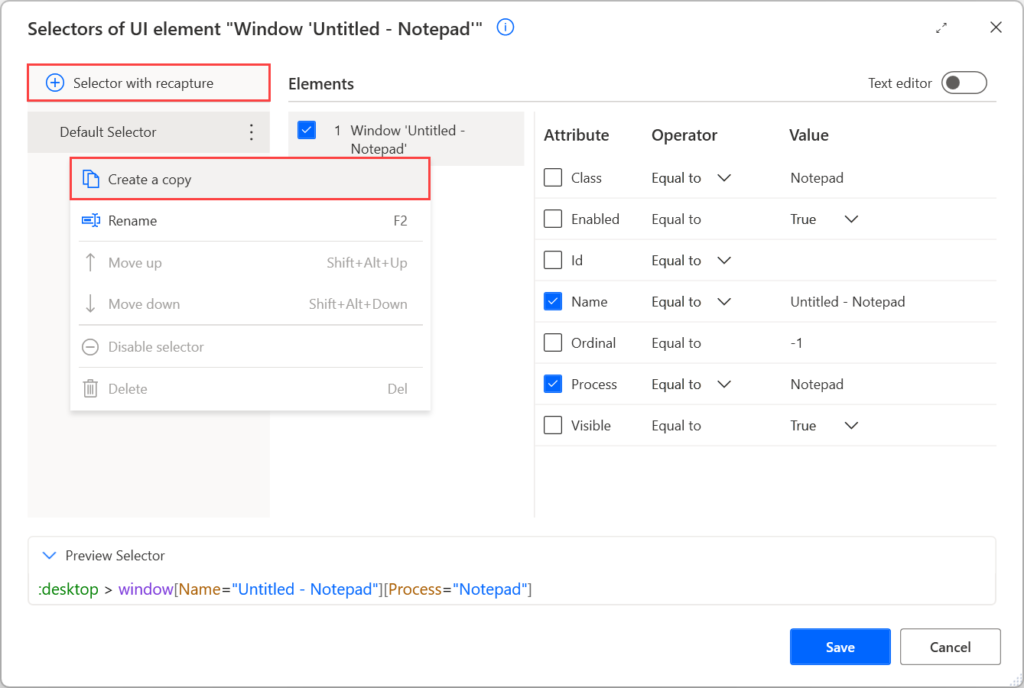
To build a custom selector, users can modify an existing selector or create one from scratch, by selecting the appropriate UI element and choosing the selectors for a UI element and use the Selector with recapture button or create a copy of an existing selector.
To edit an existing selector, select the appropriate UI element and choose the selector you want to edit.

To create a copy, right-click on the existing selector and select Create a copy.

Selectors use the > notation to indicate the hierarchical structure of the selected elements. The attributes of an element describe it uniquely and distinguish it from other elements in the same application. Enabling or disabling attributes can change the target application component of the selector. Web and desktop selectors have the same structure and functionality, with the main differences being the available attributes.
In selectors, use the > notation to indicate the hierarchical structure of the selected elements. Each element in the selector is contained within the element on its left and displayed in the following form:
element[Attribute1=”Attribute1Name”][Attribute2=”Attribute2Name”]…[Attributen=”AttributenName”]
Power Automate utilizes multiple levels of selectors to specify an application component precisely. Selectors use a tree structure that describes the exact location of a component in the application or webpage. Each level is the child of the upper-level and the parent of the lower-level selector. The selector in the lower level describes the component users want to handle.
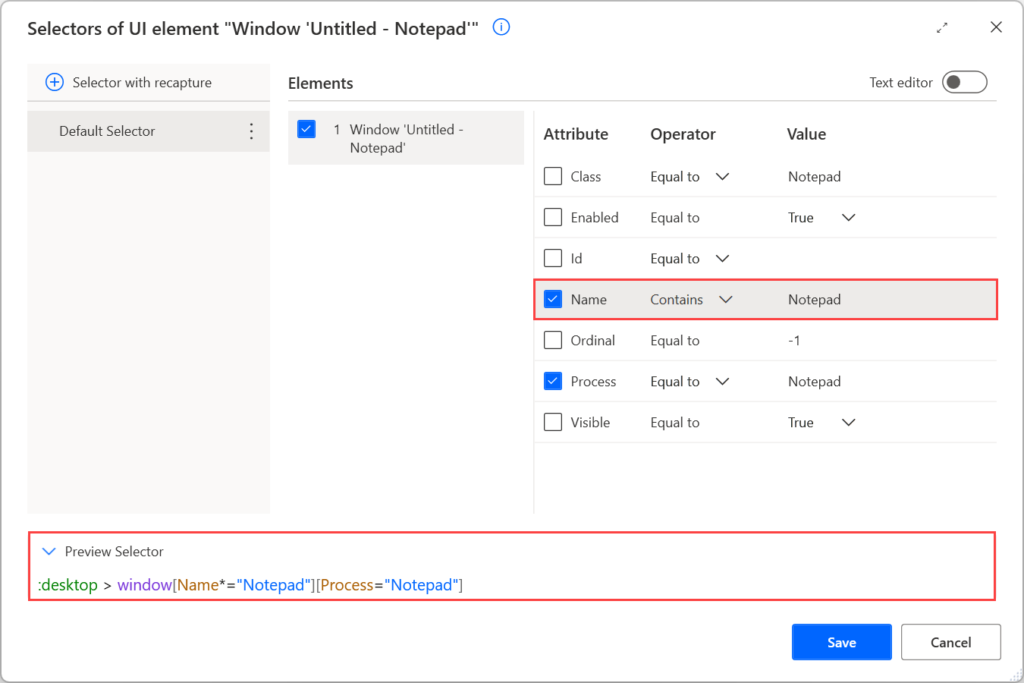
To make selectors more dynamic, users can use operators or regular expressions. The Equal to operator searches for a specific hand-coded value, while the Contains operator locates elements that always contain a specific keyword.
For example, apply the Contains operator in the Notepad selector to make it work with all Notepad windows.

Power Automate provides four more operators: Not equal to, Starts with, Ends with, and Regular expression match. Users can also create dynamic selectors using variables.
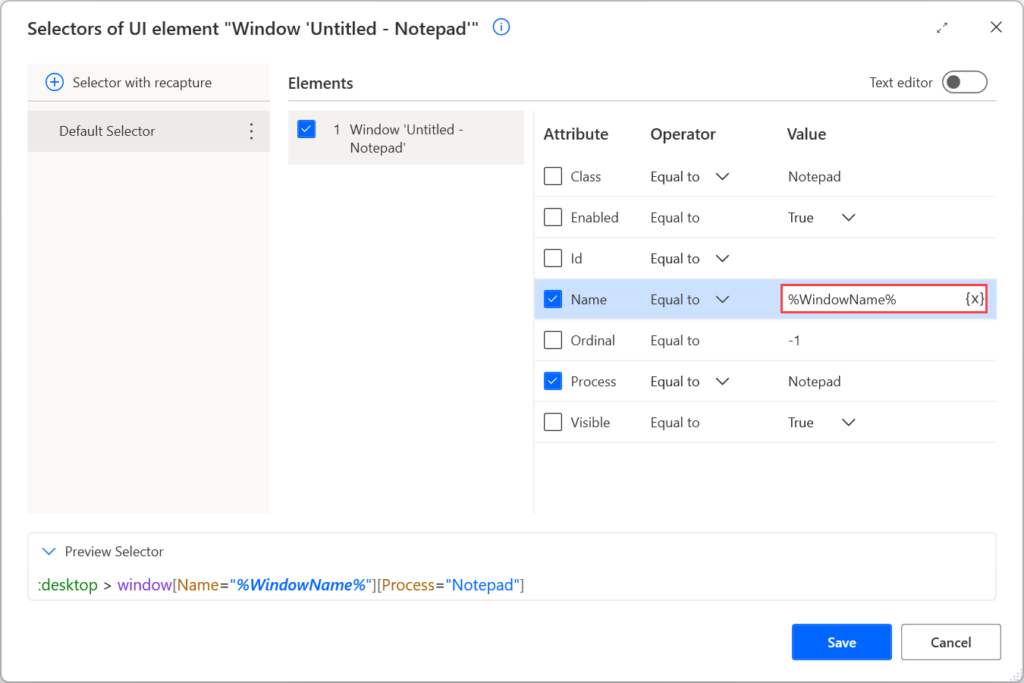
To use a variable in a selector, populate its name manually enclosed by percentage signs (%) or use the variables button. Variables can be used in both the visual and text editor. You can find more information about the percentage notation in Use variables and the % notation.
If you use a variable in the Name attribute of the Notepad example, the selector should be: desktop > window[Name=”%WindowName%”][Process=”Notepad”].
With the selector testing feature, you can now ensure that a selector, whether edited or not, can locate the specified UI element. You may perform any change in the selector and test whether the selector is valid and can find the desired UI element on the screen.
You can navigate to the UI element builder window for a captured UI element, test one or all selectors, and check whether the UI element can be found. You can perform testing immediately after opening the builder or after editing one or more selectors. The testing process will inform you whether a UI element is found on the screen (success), not found (failure), or multiple UI elements are found with the specific selector(s).
In summary, the recent update available for Power Automate Desktop allows users to edit and test selectors directly from the GUI. The feature enables users to build custom selectors and make automation workflows more dynamic, allowing for more efficient and effective automation of various tasks.

